Devs Tips & Tricks
Debug the Plugin
First, generate a debug build using the option CMAKE_BUILD_TYPE=Debug. This will
decrease the performances but allow to debug the plugin easily.
Setup for CLion
It is possible to perform a step-by-step debug of the plugin while running with IDA.
The following steps are using CLion but are
adaptable for other IDEs.
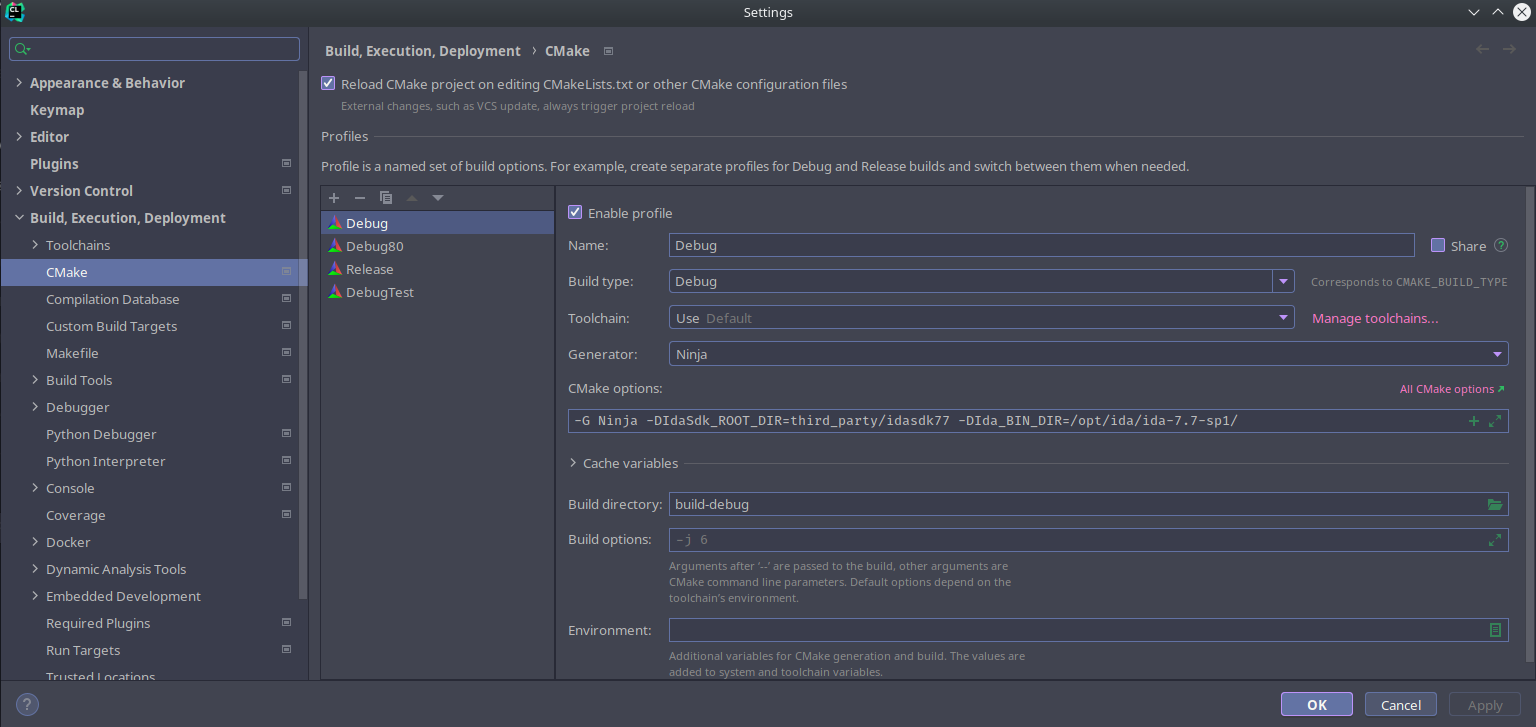
- First, configure the Profiles for the project. The two most important options
are the SDK Root directory and the IDA bin directory.
- Create a Run/Debug configuration
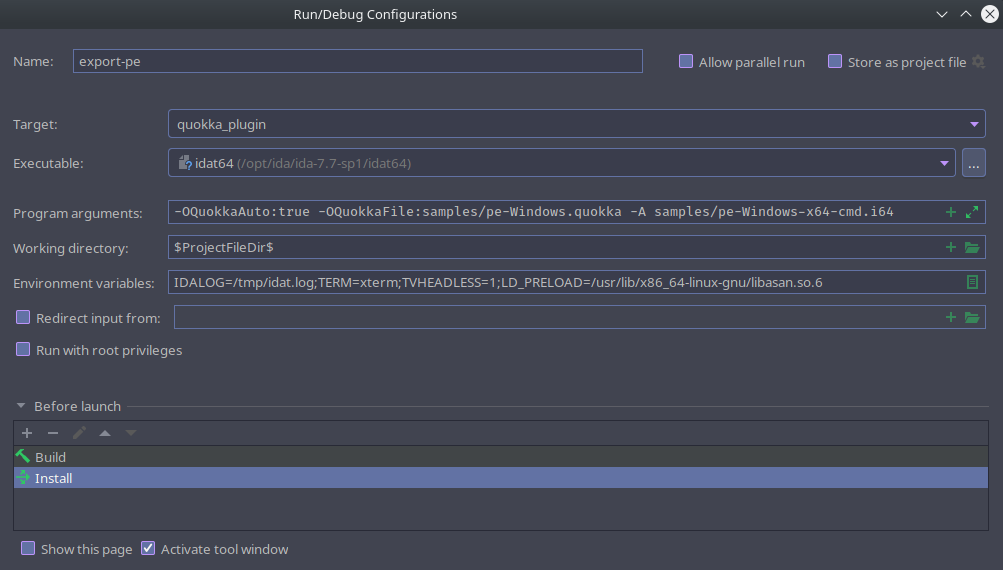
- Set the target to
quokka_plugin - Set the executable to be your
idatfile - Set arguments (the same you would use on the command line)
- Add some environment variables:
- IDALOG=/path/to/file Save the IDA's output in a file
- TVHEADLESS=1 - Improve the speed
- Set Build and Install as action before launch.
If you set a breakpoint in the code, you can now debug your plugin by simply
running Debug in CLion interface.
Use Sanitizers
By using the ENABLE_SANITIZER option in CMake, you enable
ASan.
Of note, to run with IDA, you need to specify the path to Asan using LD_PRELOAD.
Running Tests
For the plugin
The C++ tests are at best lackluster but the framework is here to improve them.
To compile and run the tests:
user@host:~/quokka$ cmake -B build-tests \
                          -S . \
                          -DIDA_VERSION=9.2 \
                          -DCMAKE_BUILD_TYPE:STRING=Debug \
                          -DBUILD_TEST:BOOL=On
user@host:~/quokka$ cmake --build build-tests -- -j
user@host:~/quokka$ ctest --test-dir build-tests
user@host:~/quokka$ cmake -B build-tests \
                          -S . \
                          -DIdaSdk_ROOT_DIR:STRING=path/to/ida_sdk \
                          -DCMAKE_BUILD_TYPE:STRING=Debug \
                          -DBUILD_TEST:BOOL=On
user@host:~/quokka$ cmake --build build-tests -- -j
user@host:~/quokka$ ctest --test-dir build-tests
For the Python bindings
user@host:~/quokka$ pytest tests/python
For the Ghidra extension
The Ghidra extension has JUnit tests:
user@host:~/quokka$ cd ghidra_extension && ./gradlew test
Python integration tests for the Ghidra export require GHIDRA_INSTALL_DIR to be
set and the extension installed:
user@host:~/quokka$ export GHIDRA_INSTALL_DIR="$(scripts/fetch_ghidra.sh)"
user@host:~/quokka$ pytest tests/python/tests/ghidra/ -v
Tests auto-skip when GHIDRA_INSTALL_DIR is unset or analyzeHeadless is not found.