IDA Plugin Walkthrough
Introduction
The default shortcut to launch QSynthesis is: Alt+S
Main Interface
Figure shown below shows the main UI after having sequentially set the parameters and clicked ‘Run Triton’ and ‘Run Synthesis’ to synthesize an expression.
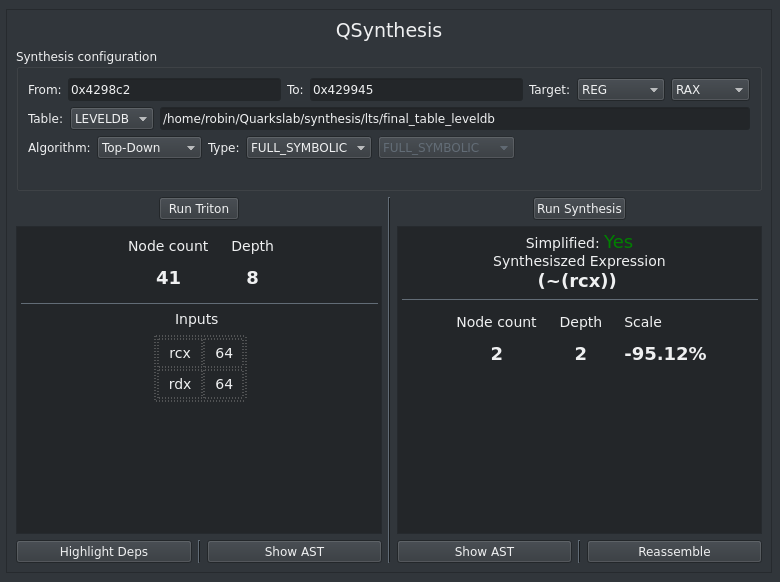
From and To fields defines the address bounds of the trace where to perform the symbolic execution. Note that the first occurence in the trace of the start address is used. Similarly, the first occurence of the stop address after the start address is used. The target is either a register, either a memory location. A third is operand but is a high-level refinement for a register or memory.
The other parameter specifies options for the synthesis, kind of algorithm etc. These parameters are directly sent to the APIs.
Warning
In full symbolic mode, ‘From’ and ‘To’ have to be located in the same basic block. (Otherwise the algorithm cannot determine which parent/children to follow). For more broad sequence of instruction please use the API directly.
Note
In full symbolic the analysis process is the exact same. The only difference is that QSynthesis assumes that all items located between ‘From’ and ‘To’ are a sequential list of instructions.
Popup Actions
Various context-menu actions are registered in the IDA-View allowing to easily select the ‘From’ and ‘To’ addresses right from the GUI. It also allows to synthesize a given operand in the view. The image below shows the context-menu added.
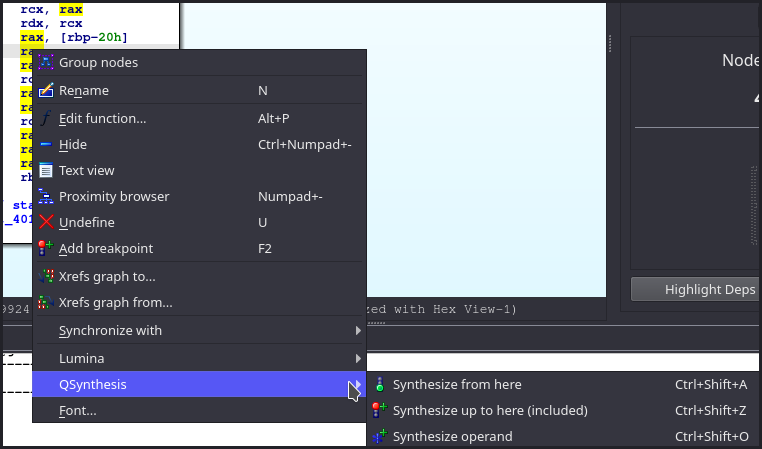
These three actions can directly be triggered with theirs shortcut Ctrl+Shift+A, Ctrl+Shift+Z for ‘From’ and ‘To’ (as it is cumbersome to copy past addresses). The last Ctrl+Shift+O takes the operand under the mouse and adjust the target accordingly.
Note
The synthesizing operand action, automatically adjust the ‘To’ address depending on whether the operand is a destination operand or a source operand.
Exploiting results
Results are shown in the two views of the main UI, but buttons at the bottom provides various functionalities described hereafter.
Showing AST’s
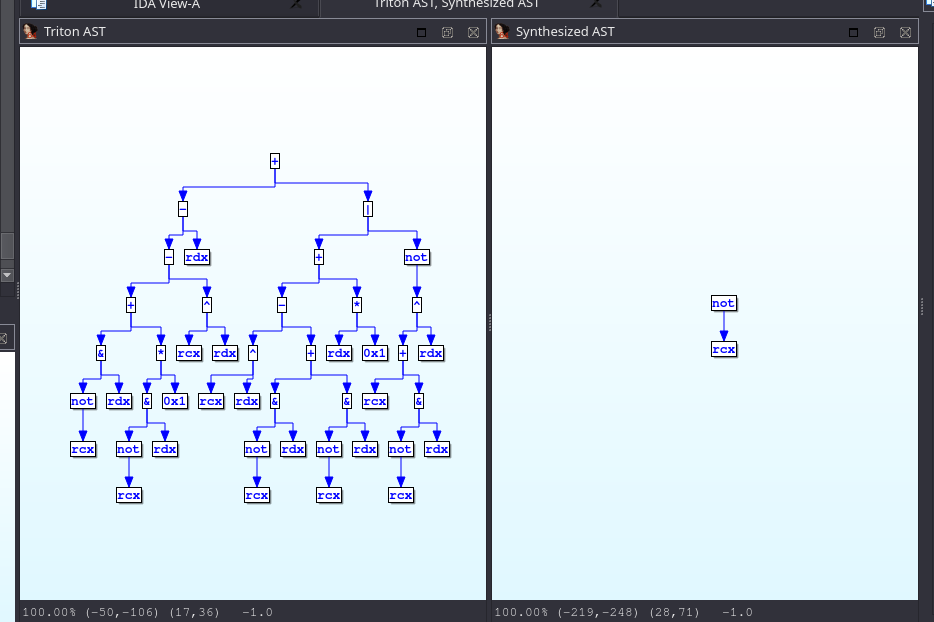
Bitvector expressions after symbolic expression and after synthesis can be printed using the graph API of IDA. The image below shows the two graph side-by-side of the AST before synthesis (Show AST button in Triton side) and the AST after synthesis (Show AST button in synthesis side)
Showing Depencencies
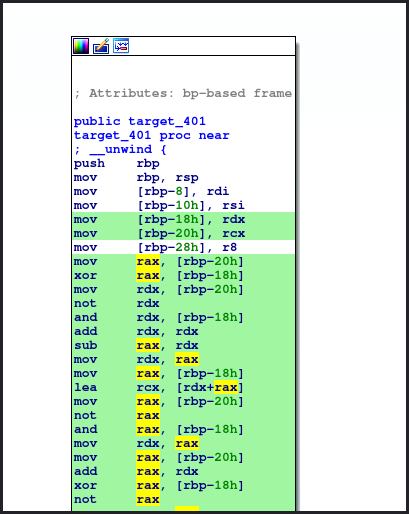
Another feature is to show the dynamic slice dependency of a bitvector expression in the IDA View. The button ‘Show Deps’ highlight in the IDA-View all instructions involved in the computation of the expression. The image below shows the result obtained.
Reassembly
The last feature provided by the plugin is a trivial (and unsound) reassembly of the synthesized AST into fresh unobfuscated instructions. The reassembly process use the amazing ayrbo project that turns Triton ASTs back to LLVM and then compiled bytes. When clicking the ‘Reassemble’ button. A dialog window asks for various parameters.
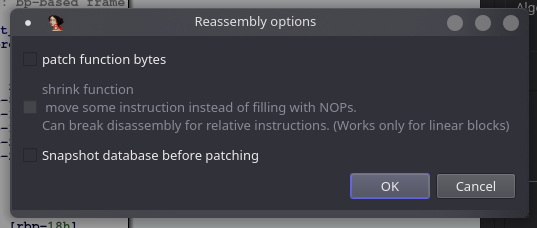
The three scenarios are:
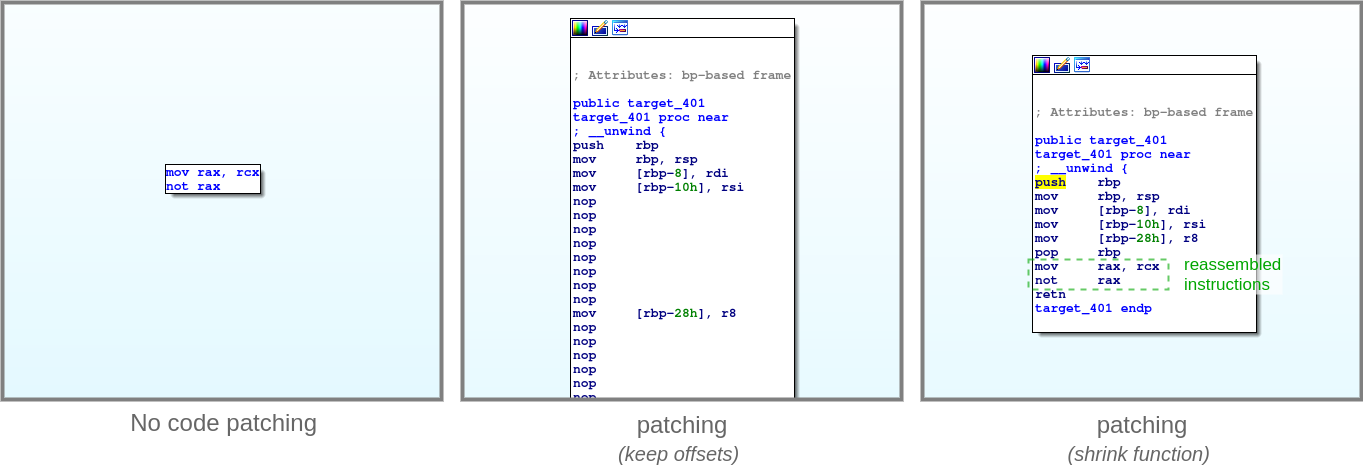
No ticking of any options: The synthesized expression is reassembled in an IDA graph view
Ticking ‘patch functions bytes’: All dependent instructions (cf. above), are erased with NOPs and the reassembled instructions are put on the ‘To’ location where it was extracted
Ticking ‘patch’ + ‘shrink function’: The function is rewriting with only instructions not in the dependency and the reassembled instructions.
The two latest, do tamper the IDB (for good :) ) and somehow save the synthesized expression result directly back in the IDB. The figure below shows the result obtained with the three variants of the reassembly.
Warning
The reassembly does not take in account use-defs etc. The reassembly is purely syntactical. Thus it might work, but to program is unlikely to run well. A proper non-interference analysis should be performed to make sure the semantic is preserved.
Debugging
Note
Once instanciated, it is possible to access the plugin object
with from qsynthesis import qsynthesis_plugin.